Tuesday, August 10, 2010

A Candy Bar Cupcake

Wait until you see this recipe...
I mean seriously, your mouth is going to start watering...
I'll give you the title first...

Peanut Butter Cookie Cups with White Chocolate Buttercream...

Is that peaking your interest?

How about a pic?
Okay...now read the ingredients...
(First give a big thank you to Cookies & Cups
who shared this most delectable recipe
and gave us step by step instructions with pics!)

1 package peanut butter cookie mix 
12 Reese's Cups

Make cookie dough according to directions on package.
Line muffin pan with cupcake liners and place unwrapped PB cup at the bottom.
Scoop approx 2 Tablespoons dough on top of PB cup
it will yield approx 12 cookie cups
Bake at 325 for approx 20-25 minutes until cookie is set...
Here's how they will look ~
Now here's where nirvana happens:
top with White Chocolate Buttercream.
Oh, you're welcome...

(will frost 36 cupcakes)
18 oz white chocolate chips (about a 12 oz bag and a half)
1/2 cup milk, divided in half
1 cup vegetable shortening
1 cup butter (2 sticks)
2 teaspoons vanilla extract
8 cups sifted powdered sugar (approx 2 pounds)

Cream butter and shortening with mixer
Add vanilla
Gradually beat in sugar, scraping the sides
Icing will appear dry when all sugar is in.
Add 1/4 cup milk.
Beat until fluffy on medium, approx 30 seconds.
In microwave safe bowl 
add white chocolate chips and remaining 1/4 cup milk.
Microwave on 50% power 1 minute, then stir, 
continuing with 30 intervals until chocolate is just melted.
If there are a few lumps, just give it a good stir until they lumps melt, 
DO NOT overheat, you will ruin the chocolate.
When chocolate is melted, add to the prepared buttercream.
Beat in on medium until fully incorporated.
Let cool for 15-20 minutes, then pipe on.
 
Are you running to the kitchen now?
I told you it was spectacular...
Enjoy & Happy Baking!

{images & recipe via Cookies & Cups}

Monday, August 9, 2010

Whooo Loves A Cute Party?

I adore owls...
They are just the cutest little things...
I'm so glad they've made a comeback...
Take a peek at this precious birthday
that I found on Shauna Younge's site
complements of Sugarcoated Events...
Love it!


I'm S-W-O-O-N-I-N-G over this cake!

Friday, August 6, 2010

Sweet Friday

Jenna from Eat, Drink, Pretty really knows how to celebrate...
We should take a cue from her...
After all it IS the beginning of the weekend..
Have a great one!
gorgeous pink dessert buffet ideas

Thursday, August 5, 2010

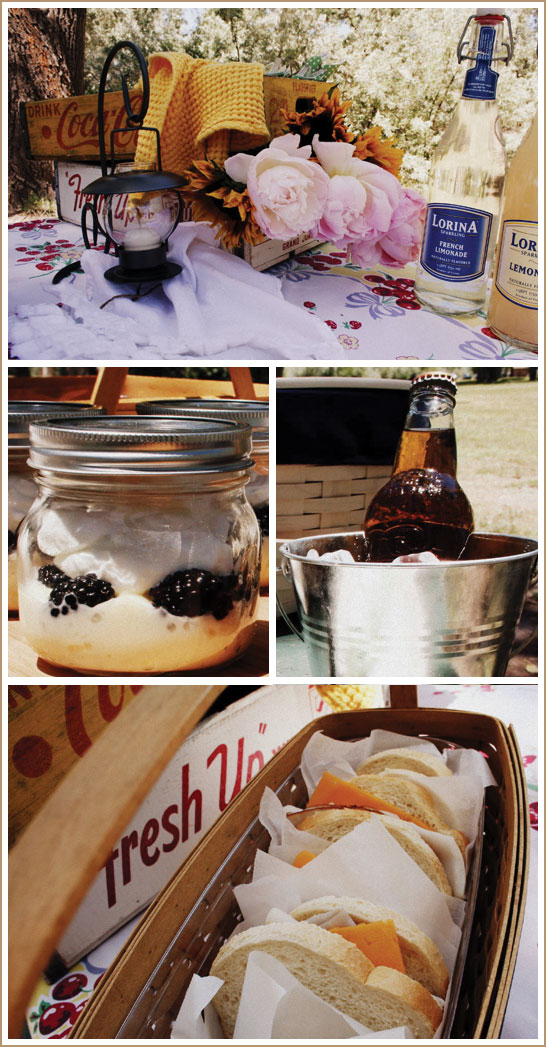
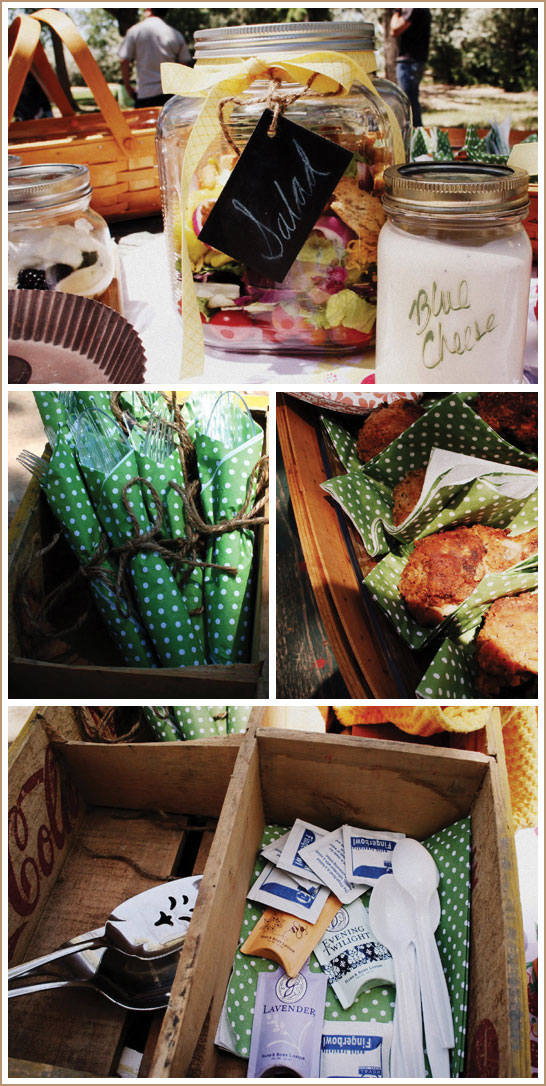
A Vintage Picnic

This makes me want to have a picnic...
Not your ordinary picnic...
but a vintage one...
With the menu and accessories well planned out...
like this...
These details are amazing!


Vintage Summer Picnic


Vintage Summer Picnic
image via The Cake Blog...

Wednesday, August 4, 2010

Ramona and Beezus

I adored all the "Ramona" books when I was little...
I think I've read every book that Beverly Cleary has written...
I have so many of them in my classroom library 
but it doesn't seem like her books are as popular with children these days...
Well, I was beyond thrilled when I saw that Ramona & Beezus
was coming to the big screen...
So, yesterday, Goosie Girl and I went to the 11:00 showing...
I didn't know what to expect...
Sadly, I was expecting it to be "okay"...
Luckily, I was wrong...
IT WAS THE SWEETEST LITTLE MOVIE EVER!!!!
I L-O-V-E-D IT!
I hope this movie sparks the interest of small ones to want 
to read more about Ramona's adventures...

Tuesday, August 3, 2010

Easy To Make Bags

I just love the new blog, Hip Hip Hooray...
it's just adorable!
You should definitely check them out if you haven't already...
Well...
I saw this sweet little bag on there last week
and was just admiring its simplicity yet preciousness...
and then...surprise...yesterday they gave us the how to...
How awesome is that?
Wait till you see how easy it is to make...
You could use any type of bag...
I was even thinking how neat it would be for school...
the possibilities are endless...
Here are the step by steps as told by Hip Hip Hooray...
these canvas bags and a simple design we created and printed onto the iron on transfers.
Once we printed the design onto the transfer we then cut it out and simply ironed.
And done  – simple, sweet and reusable lunch bags!

Monday, August 2, 2010

Faux Gumball Machine How-To

Gumballs and their machines
are the perfect addition to any sweet party...
Sometimes they may be rather hard to find...
or maybe not in the color you had in mind...
Here's a how-to make your own...
compliments of  Craft Tutorials...
gumball


What you Need: 
  • Terra Cotta plant pot-4″ inside circle diameter
  • Terra Cotta plant saucer-4″ inside circle diameter
  • Plain ivy bowl measuring 2 1/2″ across the top (preferably no fluted edge)
  • Paint Primer
  • Red gloss paint or red craft paint and gloss sealer
  • clear silicon caulking-aquarium caulking works great
  • printed gumball machine front
  • white glue
Instructions:
1. Apply paint primer to all surfaces of the terra cotta pot and the saucer. 
Let the primer dry, then apply red gloss paint to all surfaces. 
Alternatively, cover the primer in red craft paint 
then spray or paint with a gloss sealer. 
Let the paint (and sealer, if using) dry completely.
2. Turn the pot upside down. 
Apply a bead of clear silicon caulking around the bottom of the ivy bowl 
and center it on top of the pot. Push the ivy bowl firmly into place 
and weigh it down with a book or other heavy object until the glue dries completely.
3. Print the gumball machine front and cut closely around the picture, 
leaving no extra white at all. 
Glue this to the front of your gumball machine with white glue.
4. Fill the ivy bowl with gumballs.
5. Place the red terra cotta saucer upside down on top of the ivy bowl.


Now they can be customized to fit your party...
like these...