Showing posts with label Flag banner. Show all posts

Friday, March 25, 2011

Sweet Friday - Bunting, Flag Banners, Garland

Could anything be sweeter than bunting, flag banners, garland?
(Whatever you'd like to call it)...
I completely think not...
I don't know what it is about it but it's just so happy...
Perfect for a Friday...
Here are a few favorites that I spied on Etsy...
Add a little tulle skirt to this...oh my!
Could there be anything more precious?
A cake topper...
How sweet would this be in a little girl's room
hanging on a dresser or mirror...
Talk about a fabulous way to spice up an ordinary cake...
fondant bunting...
I love, love, love this!


And of course my favorite done by Potter & Butler...

Thursday, August 19, 2010

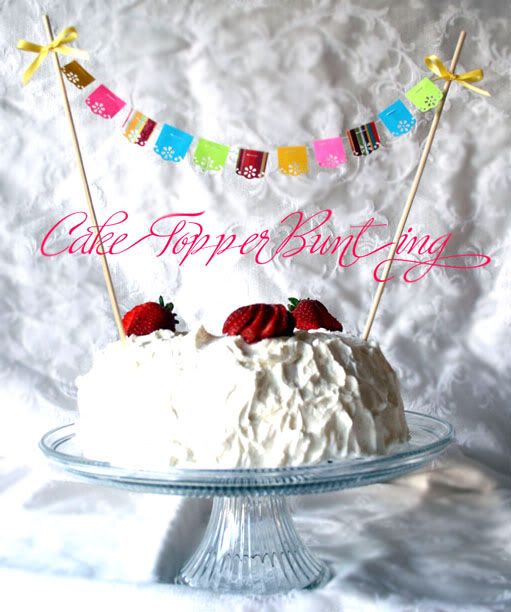
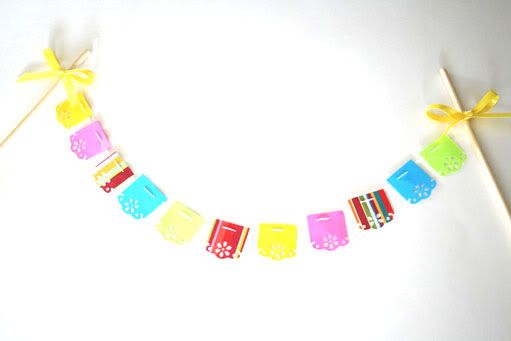
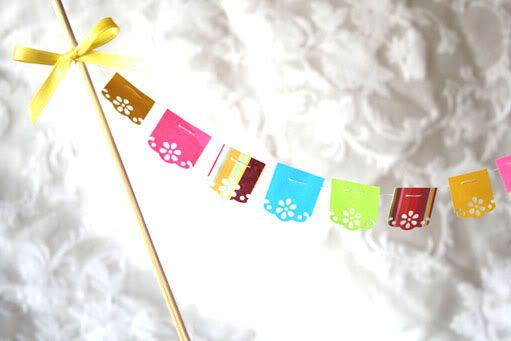
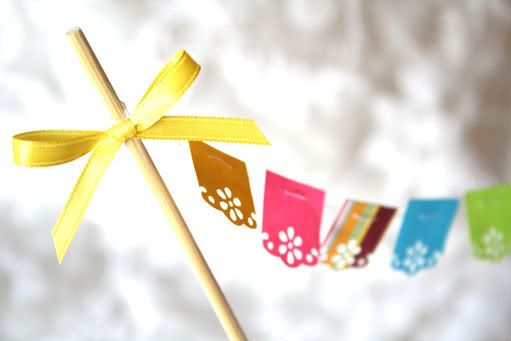
Cake Topper Bunting

I love the use of flag bunting at parties...
So when I started to see it used as decorations
on cakes, I was swooning!
But wait...
It gets better...
Nikki from Lovely Scribbles (who is related to Jenna from Eat, Drink, Pretty both of which have cohosted gorgeous parties in the past few weeks) gives us the 411 on how to make them...
Yippee!
Here is her step by step tutorial...
Photobucket
Supplies
1. Color paper
2. Paper cutter and/or scissors
3. Dye cut paper punch in a pattern of your choice
4. 2 wooden skewer sticks
5. White thread
6. Needle
7. Hot glue gun
8. Ribbon


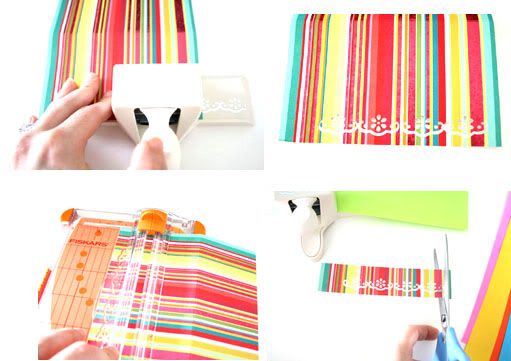
Step 1: Punch each sheet of color paper with the dye cut paper punch and cut out mini flags with the pattern as the bottom of the flag.

Photobucket

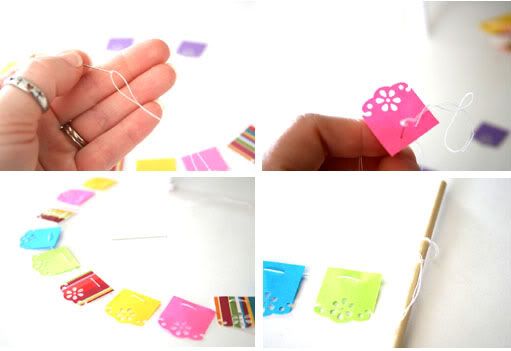
Step 2: Double thread the needle with white string to make the stitch more prominent.

Photobucket

Step 3: Once you have the flags strung and placed however far apart you would like them, tie each end of the string around a skewer stick.

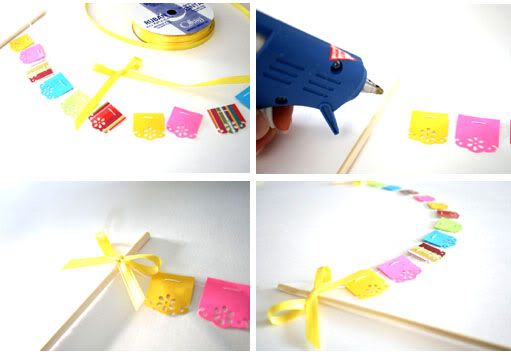
Step 4: Take the ribbon and tie into two small bows.

Step 5: With your glue gun, glue each bow on top of where you tied the thread. This will hold the thread on the stick as well as hide the knot.

Photobucket

Photobucket

Photobucket

Photobucket


{Top 2 images via Kiki LaRu found via Hip Hip Hooray}
All other images via Lovely Scribbles

Monday, June 28, 2010

Paper Banners

Banners have always been popular
to use at parties...
I'm not really a fan of those plasticy ones...
I'm so glad we've graduated to paper and/or fabric...
aren't you?
You can customize your colors, the font, the shape...
everything...
Perfect for any type of party, recognition, welcomes,
good-byes, classrooms, you get the picture...
Here is an easy how-to from One Charming Party...
If you've never checked her out, you should...
She has wonderful ideas & beautiful eye candy...
paper banner tutorial 2

directions:

1. Cut out circles and letters, about 3 or 4 inches.

2. Choose your ribbon color
3. Using adhesive, stick the letter to the circle
4. Hole punch two holes to the top of the circle to thread ribbon
5. Thread the ribbon through the top,leaving enough ribbon on each side to hang

Friday, November 20, 2009

Goosie Girl's Teacher's Birthday - The Day...

Goosie Girl's teacher's birthday (Mrs. Qualls) is today. Goosie Girl and I got up extra early to go and put up a few festive decorations to celebrate Mrs. Qualls' day...


First thing we hung was the personalized flag banner that I made. It's not exactly perfectly straight...oh well...we were in a hurry...and it still looks cute!

We hung this sweet semi-pomendor on her door to welcome her. It's a semi pomendor because I didn't have enough flowers to cover the entire styro square. No worries though...I covered the bottom with tulle, tied with a bow, added the birthday tag and voila...

This was very easy to make. I bought a styro square at the dollar store. Goosie Girl wanted "these" flowers (doesn't exactly match but oh well...), cut the flowers close to the top and stick in the styro. I used straight pins to secure the flowers. When I ran out of flowers, I wrapped the rest of the square with tulle, added the same black & white ribbon I used for the handle and that's it.

This is my favorite...I bought the square vase at Old Time Pottery for $1.99, I picked this flower arrangement out at Publix ($6.99), sliced up one apple (since it's for a teacher...get it? teacher...apples) and placed those along the side of the vase, added the flowers and instant beauty for $10.00. How much would this have cost if you ordered it from a florist?
The flower arrangement & a large party hat (that I also bought at the dollar store. I did well there too, no?) with a personalized birthday tag sitting on her back table.
The other flag banner that I made...I attached it to her white board so the children could appreciate it all day. Goosie Girl said that was a good place to hang it...now Mrs. Qualls couldn't write on the board and that meant less work...we also tied a bouquet of balloons on her overhead for more festivity...
One of the two pans of cupcakes for the celebration this afternoon. Complete with wrappers & personalized toppers.

Whew!
I wanted to make sure Mrs. Qualls knows how much we appreciate her!


Thursday, November 19, 2009

Flag Banner

I've noticed lately that flag banners have become a very hot commodity in decorating. Since Goosie Girl's teacher's birthday was tomorrow (and since I wanted to partify her room) I thought I would give this flag banner thing a try. I couldn't believe how easy it was!

This really is all you need...
I bought the die cut letters at the dollar store (ready to be punched out)
I used colored paper that I already had
Ribbon
Tape runner
and of course scissors and/or a paper cutter

Just make your flag template to trace on each paper & cut out however many letters you need. I had quite a few because I made two banners, one saying Happy Birthday Mrs. Qualls & one saying Mrs. Qualls rocks.
Get your ribbon (but don't cut it, I left it on the spool as I used it)
You are going to run the tape runner along the top
Leave some extra ribbon on the side (for hanging purposes) and line the ribbon along the top along the glue
Line up the next flag and continue with the glue & ribbon until you have the word complete
This is one flag. When I hang this I will have 4 flags...Happy Birthday Mrs Qualls
It is large when all parts are laid out. Great for decorating large spaces...
This one is going to be hung outside on her classroom window...
I used wide black ribbon...
This one will be hung on her whiteboard...
I used multicolored paper for this one and thin white ribbon

Tonight I will be making her flower arrangement with the apples. I am also going to try & make a pomendor to hang on door handle...

I'll take pics & share tomorrow morning (after I decorate at like 7am before she gets there...)

P.S. - You could use any paper and/or material to make this...sky's the limit...whatever coordinates with your theme. How adorable! and reusable...