Sunday, November 29, 2009

Wrapping the "Lilly" Way

I stopped into the Lilly Pulitzer shop this past weekend... I forgot how much I love all things Lilly! All the pinks & greens, clothes, shoes, accessories,notebooks, calendars, coffee cups, wrapping paper. I was like, uh...yes please...I want it all! Lilly also didn't refer to Black Friday as Black Friday but "Pink Friday." How fun! The store was decorated for the holidays but not in your traditional colors but Lilly colors. Even pink & green cupcakes to nibble on. I just loved it, loved it, loved it! When I got home, I pulled out my two Lilly Pulitzer books (one about celebrating everyday life & one for Holidays). I was ready to start planning soirees. I also found this darling wrap job at kate's paperie. Really, is this the most adorable gift wrap you've ever seen? They're just happy little things aren't they? Here's the how to for us all to wrap the "Lilly" way...

Lilly Pulitzer Edition


With their signature designs and vivacious color palette, Lilly Pulitzer paper goods are guaranteed to add just the right amount of pop to any gift.

We started with the Lilly Pulitzer wrap in pink and green, but feel free to mix and match colors and textures for any occasion.

When wrapping, keep these tips in mind:
• tape and glue dots are always hidden
• cut edges are always folded under
• paper should be tight with neat edges and corners


Step 1

1. Start with the Lilly Pulitzer paper for the primary wrap.
2. Trim paper to size, leaving enough to overlap.
3. Fold over the ends to avoid exposed edges and take the folded ends to the edge of package to disguise the seam.


Step 2

4. Turn package on its end and fold in the side flaps.
5a-b. Place package top-side down and finish folding the ends, folding over raw edge for a clean finish.


Step 3
Step 4

6. You’ve completed your base wrap.

We used Kate’s 1.5" satin ribbon to make a basic criss-cross accent on the wrap. Feel free to choose another color (you can browse our selection here).

7a-c. Cross the ribbon on top to maintain a flat bottom.
8. Tie the ribbon in a half-knot to secure.
9. Now, embellish the top with the Lilly Pulitzer party pom-pom, assembling according to the instructions enclosed in its containing packaging.

Finished! Now you’ve got a sassy gift that’s pretty in Pulitzer.


    Friday, November 27, 2009

    A Children's Christmas Party

    Can you believe that Christmas is now in full swing? I'm loving this Children's party from Southern Lady...whimsical and fun. Any child would be dreaming of sugarplums after they experienced this sweet get-together especially put together for them. Wouldn't this be a perfect ending to a cookie decorating party or a designing of gingerbread houses?
    So festive, isn't it? It puts me in a good mood just looking at it.
    Can we say precious?! White tablecloth on the bottom followed by a striped one on the diagonal over top. Add the accessories and you have perfection, no?

    I'm absolutely loving Santa, his reindeer & the trees (all from Lamb's Ears, Ltd 205-969-3138)

    Who said decorations had to be expensive & store bought? What a great way to display all the artwork that is created and/or comes home from school...
    Personalized plates that could double as favors (from Weezer's)
    Just adorable!

    Wednesday, November 25, 2009

    Chocolate-Pecan Dipped Marshmallows

    So yesterday I ended up making the ooey, gooey homemade marshmallows. They were very easy; just very sticky until I dusted them with the confectioners' sugar. My family was unimpressed...said they tasted like regular marshmallows. Go figure! Today I decided to give them a little bling bath. I melted chocolate, poured some chopped pecans in a bowl and went on to dip half the little fluffs first into the chocolate and then into the pecans. They turned from regular marshmallows into a decadent dessert (and yes my family liked the chocolate, pecan accessories that were added). And they looked pretty too. They will be a nice sweet appetizer to have out tomorrow...

    Goosie Girl wishes you and your family a wonderful thanksgiving!

    Chocolate, pecan bling
    Now we can say yummy!

    Tuesday, November 24, 2009

    Homemade Marshmallows

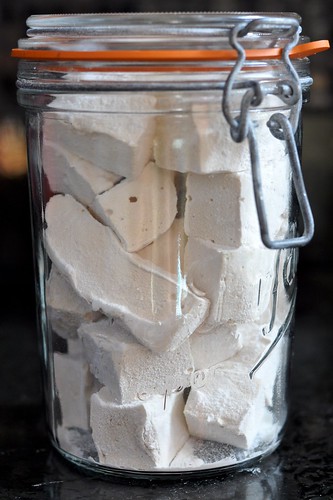
    There is something about marshmallows that conjure up warm & fuzzy thoughts. Mini marshmallows floating around in your hot chocolate, ooey, gooey marshmallows after being roasted over a campfire, marshmallows used in rice krispy treats, and the list goes on...I must admit though, I have always bought my marshmallows from a store. I have never tried my hand at making them myself. I'm getting ready though...Again, I have noticed marshmallows gracing dessert tables (can we say Amy Atlas?) and they always look so fluffy, cloudlike & downright delicious. They can be elegant (with a dusting of powdered sugar) and yet decadent (maybe dipped in chocolate). They're multifunctional, sweet enough to be a dessert at a bridal shower & hardy enough to be at a children's party.
    marshmellows by You'reMyFavorite.
    Here is the recipe I am going to use when I make these little lovelies...

    3 Tablespoons unflavored gelatin (about 3-1/2 envelopes)
    1 cup cold water, divided
    2 cups sugar
    1/2 cup light corn syrup
    2 egg whites
    1 teaspoon vanilla extract
    1/4 teaspoon salt
    Sifted confectioners sugar

    1. Lightly spray a 9x9 baking pan with nonstick spray with flour & set aside
    2. In a small bowl, combine gelatin & 1/2 cup water & set aside
    3. In a small saucepan, combine sugar, corn syrup, & remaining 1/2 cup water over medium high heat, stirring constantly, until sugar is dissolved. Cook without stirring until sugar mixture
    reaches 240 degrees on a candy thermometer.
    4. In a medium bowl, beat egg whites, vanilla, and salt at high speed with an electric mixer until
    stiff peaks form. In a separate bowl, combine gelatin & hot syrup mixture. Beat at high speed
    with an electric mixer until mixture is thick & tripled in volume (about 3-4 minutes). Fold in egg
    mixture. Spread mixture evenly into prepared pan. Sprinkle top with confectioners' sugar.
    Refrigerate for 2 hours, or until set. Remove from pan & cut into squares.

    **Note**
    The marshmallows will be easier to cut if you freeze them prior to cutting. You may also want to spray the knife with nonstick spray to prevent the marshmallows from sticking to it.

    **Yummy additions you may want to add**
    2 cups graham cracker crumbs
    8 ounces toffee bits
    8 ounces chocolate chips, crushed

    Add these items in step 5 after you have combined the gelatin & hot syrup mixture. Beat the yummy additions for 2 minutes or until mixture is thick & tripled in volume and then continue on with the rest of the directions.
    homemade marshmallows by robayre.

    Perhaps, perfect for that cup of hot chocolate after decorating the Christmas tree?
    Homemade marshmallows by anjuli_ayer.
    Now who wouldn't love to get these pretty's as a gift?

    Recipe from Southern Lady, Images from Flickr

    Sunday, November 22, 2009

    Clothespin Dolls

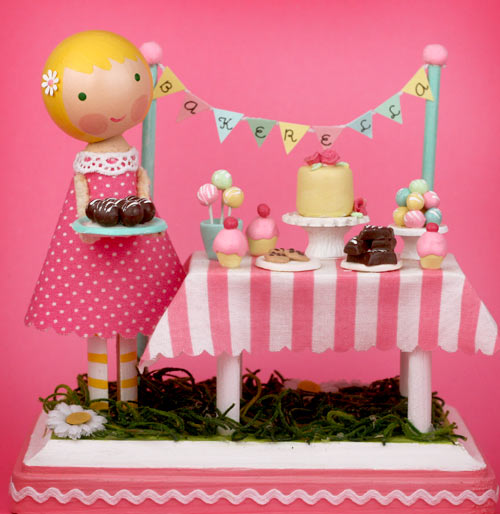
    The first time I ever saw a "clothespin doll" is when Lollipop Workshop sent Bakerella

    this precious girl and an "Amy Atlas" dessert table as a gift...


    From the Lollipop Workshop
    From that moment on I have been in love with these little girls...
    Mari Jane by fromnancysheart.
    Have you ever in your life seen anything so adorable?
    They make me happy just looking at their angelic faces and
    all the detail that has been put into them...Do you agree?

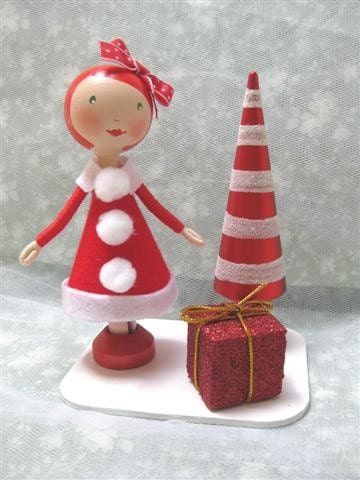
    http://www.etsy.com/shoWooden Clothespin Christmas Doll - Miss Claus
    http://www.etsy.com/shop/enchantedbelles
    Can you say precious??? I mean really...could you imagine having a
    collection of these little sweeties?

    Clothespin Wee Cutie with Snowman by Wee Cute Treasures.

    http://www.etsy.com/shop/weecutetreasures
    I'd just pull up a chair and admire them all day...they come in all different styles
    for all the different celeabratory times throughout the year...
    obviously Christmas (as you have just seen), Fall, Birthdays, Patriotic
    and the list goes on...

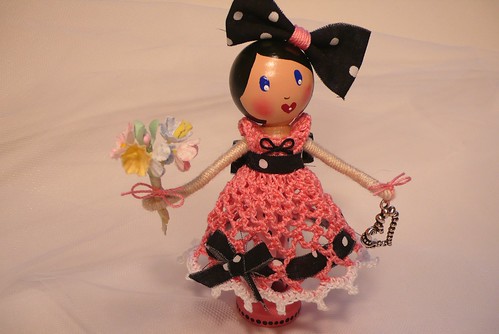
    Sweet Caroline - Clothespin Doll by creatingtreasures.
    Hello my pretty! Can you say a-dor-a-ble?? Look at her!
    Look at her crocheted dress! And that bow! All the details...Oh my...

    Friday, November 20, 2009

    Goosie Girl's Teacher's Birthday - The Day...

    Goosie Girl's teacher's birthday (Mrs. Qualls) is today. Goosie Girl and I got up extra early to go and put up a few festive decorations to celebrate Mrs. Qualls' day...


    First thing we hung was the personalized flag banner that I made. It's not exactly perfectly straight...oh well...we were in a hurry...and it still looks cute!

    We hung this sweet semi-pomendor on her door to welcome her. It's a semi pomendor because I didn't have enough flowers to cover the entire styro square. No worries though...I covered the bottom with tulle, tied with a bow, added the birthday tag and voila...

    This was very easy to make. I bought a styro square at the dollar store. Goosie Girl wanted "these" flowers (doesn't exactly match but oh well...), cut the flowers close to the top and stick in the styro. I used straight pins to secure the flowers. When I ran out of flowers, I wrapped the rest of the square with tulle, added the same black & white ribbon I used for the handle and that's it.

    This is my favorite...I bought the square vase at Old Time Pottery for $1.99, I picked this flower arrangement out at Publix ($6.99), sliced up one apple (since it's for a teacher...get it? teacher...apples) and placed those along the side of the vase, added the flowers and instant beauty for $10.00. How much would this have cost if you ordered it from a florist?
    The flower arrangement & a large party hat (that I also bought at the dollar store. I did well there too, no?) with a personalized birthday tag sitting on her back table.
    The other flag banner that I made...I attached it to her white board so the children could appreciate it all day. Goosie Girl said that was a good place to hang it...now Mrs. Qualls couldn't write on the board and that meant less work...we also tied a bouquet of balloons on her overhead for more festivity...
    One of the two pans of cupcakes for the celebration this afternoon. Complete with wrappers & personalized toppers.

    Whew!
    I wanted to make sure Mrs. Qualls knows how much we appreciate her!


    Thursday, November 19, 2009

    Flag Banner

    I've noticed lately that flag banners have become a very hot commodity in decorating. Since Goosie Girl's teacher's birthday was tomorrow (and since I wanted to partify her room) I thought I would give this flag banner thing a try. I couldn't believe how easy it was!

    This really is all you need...
    I bought the die cut letters at the dollar store (ready to be punched out)
    I used colored paper that I already had
    Ribbon
    Tape runner
    and of course scissors and/or a paper cutter

    Just make your flag template to trace on each paper & cut out however many letters you need. I had quite a few because I made two banners, one saying Happy Birthday Mrs. Qualls & one saying Mrs. Qualls rocks.
    Get your ribbon (but don't cut it, I left it on the spool as I used it)
    You are going to run the tape runner along the top
    Leave some extra ribbon on the side (for hanging purposes) and line the ribbon along the top along the glue
    Line up the next flag and continue with the glue & ribbon until you have the word complete
    This is one flag. When I hang this I will have 4 flags...Happy Birthday Mrs Qualls
    It is large when all parts are laid out. Great for decorating large spaces...
    This one is going to be hung outside on her classroom window...
    I used wide black ribbon...
    This one will be hung on her whiteboard...
    I used multicolored paper for this one and thin white ribbon

    Tonight I will be making her flower arrangement with the apples. I am also going to try & make a pomendor to hang on door handle...

    I'll take pics & share tomorrow morning (after I decorate at like 7am before she gets there...)

    P.S. - You could use any paper and/or material to make this...sky's the limit...whatever coordinates with your theme. How adorable! and reusable...

    Wednesday, November 18, 2009

    Thanksgiving Tablescape

    I really want to make my Thanksgiving table special this year instead of the "norm" setting that I usually do. I happen to see a color scheme awhile ago that I loved on Pepper Design Blog and it has been in my mind ever since...brown, turquoise, orange & white. So I decided those were the colors I was going to use...
    My china is Floradora Green by Royal Daulton. I still love it to this day! It is a floral pattern with so many colors in it that it really blends with everything. It has quite a bit of the turquoise color in it with hints of orange as well. Yeah for me!


    First, I ordered a brown filigree tablecloth off ebay for $5.00 (regularly $50.00...how awesome was that?). I also knew that I wanted some kind of "charger" look so I set off looking. First stop and only stop was at Old Time Pottery. I don't go in too often but I hit it right on this particular day. I found the brown glasses (which actually have a nice, heavy feel to them) for $1.99. I put those babies in the cart. I then went to the table linen isle and found these rattan type placemats that I decided would look good as my chargers. The problem was they came in a granny smith apple green color ( that I loved...but not for my thanksgiving table). After some quick thinking, I stuck them in my cart and decided that they were spray paintable. Yeah again! Next, I found these perfect napkin rings, in my brown color, mind you, for $1.00. Triple yeah!
    I perused the rest of the store, found three adorable christmas trees that I am going to use on my christmas tablescape (they were $10.00 for all 3).
    Now here's where it gets good....those charges that I bought that were the new christmas green? I spray painted one side turquoise, left the other side the original green and now I have two uses for them and only paid once. Is the greatest?! I'm so excited!

    Original color...which I will be using for my Christmas tablescape...

    Flip it over and voila...New turquoise color that I will be using for my Thanksgiving tablescape...

    Mini pumpkins on a white tray (tray I found at HomeGoods for $4.99 & pumpkins, which came in a mini pack, from Target) & 2 arrangements of orange tulips will also be gracing the table as well...of course candlelight too!

    I'm so excited, I can't stand it! Inexpensive & it's going to be beautiful...all things to be thankful for...

    Friday, November 13, 2009

    Winter Dessert Table

    I've seen this pic floating around but I grabbed it from The Hostess with the Mostess. This is what she had to say...


    Maddy from Inspired Bride and Amanda from Bake It Pretty recently put together this absolutely stunning “Winter Wonderland” themed dessert buffet… seriously, how gorgeous is this?!


    Winter Wonderland Dessert Buffet

    categories: DIY, food presentation, holiday ideas, wedding

    winter wonderland wedding dessert candy buffet

    Is this not gorgeous? I love the tiffany blue & white...

    elegant yet festive. And it doesn't look

    like it would be that awfully hard to recreate...